How to Post a Simple Product on Uzanga (Step-by-Step Guide)
New to Uzanga? This guide walks you through how to post a simple product without variations, including pricing, stock, categories, photos, and product setup tips for a clean storefront experience.
One of the easiest ways to start using Uzanga is by posting a simple product.
This is the most common type of product for many businesses, especially thrift stores, sneaker stores, and businesses selling unique one-off items.
In this guide, we’ll walk through how to post a simple product on Uzanga step by step and explain what each section means along the way.
What is a Simple Product?
A simple product is a single item without multiple versions or variations.
For example:
- One Panda Dunk in size 42
- One specific perfume bottle
- One handbag in one color
Unlike products with variations, simple products do not need multiple sizes, colors, or combinations.
This makes them much quicker to upload.
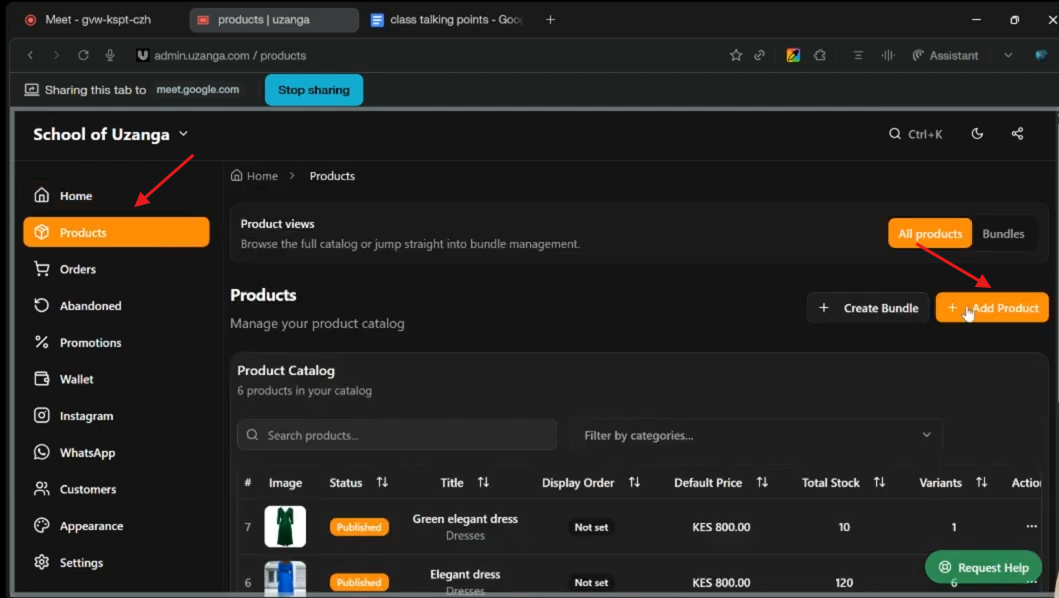
Step 1: Go to Products
From your Uzanga admin dashboard:
- Open Products
- Click Add Product
This opens the product creation form.
Step 2: Add the Product Title
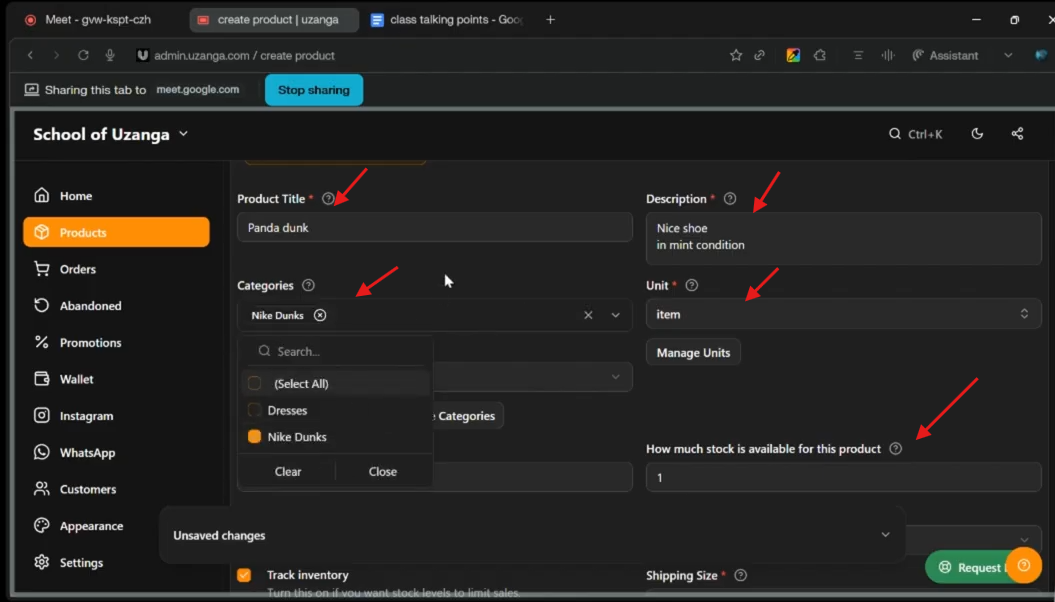
The product title should clearly describe the item you are selling.
For example:
Panda Dunk
Keep titles simple and easy for customers to understand.
Step 3: Add a Product Description
The description gives customers more information about the product.
For example:
Nice shoe in mint condition.
You can also include:
- size
- color
- condition
- material
- availability
- any extra details customers may need
A good description helps customers make purchasing decisions faster.
Step 4: Select the Product Category
Choose the category that best matches your product.
For example:
- Nike
- Sneakers
- Perfume
- Handbags
Categories help organize products properly on your storefront.
Step 5: Set the Selling Price
This is the amount customers will pay for the product.
For example:
Ksh 3,500
Make sure the price entered is your final selling price.
Step 6: Add Stock Quantity
The stock field tells Uzanga how many units of the product are available.
For example:
Stock: 1
This is very common for thrift businesses or one-off products where only one item is available.
Step 7: Choose Product Type
For a simple item:
- Select Standard Product
- Select Physical Product
This tells Uzanga that:
- the product is a normal standalone item
- it requires physical delivery
Step 8: Leave Automatic Fields as Default
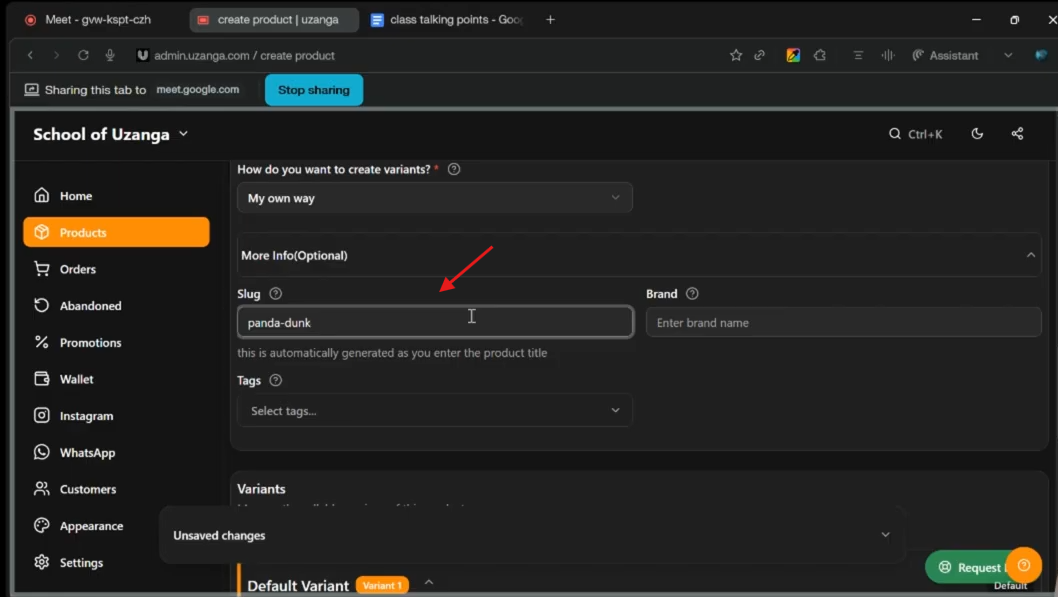
Some fields, such as the slug, are generated automatically by Uzanga.
In most cases, you can leave these fields unchanged.
Uzanga will handle them for you automatically.
Step 9: Add the Brand
The brand field helps organize and identify products properly.
For example:
- Nike
- Chanel
- Shein
- Adidas
If the product has a known brand, it is a good idea to include it.
Step 10: Add the Variant Name
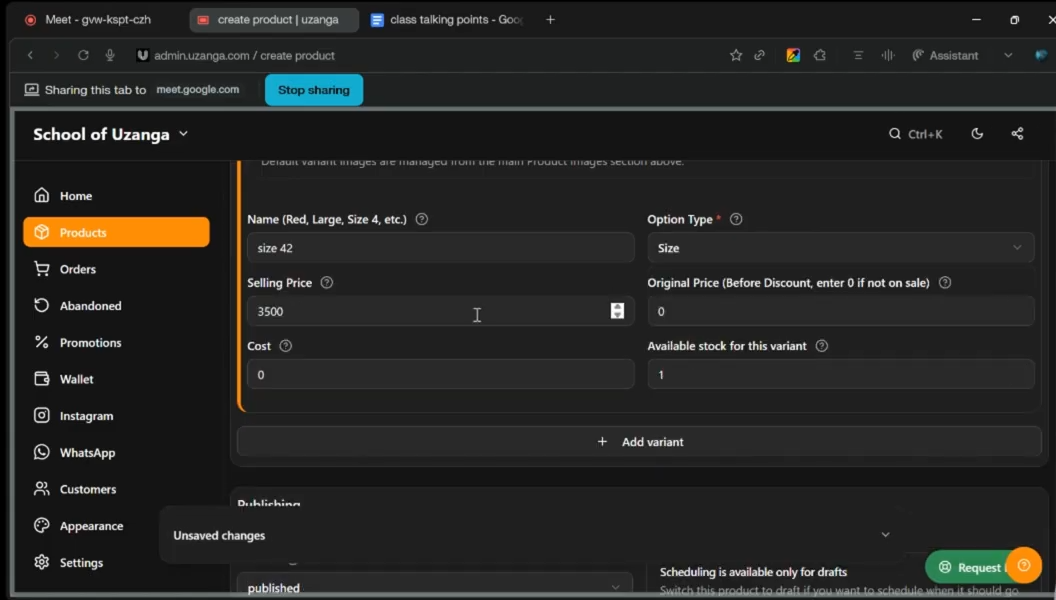
Even simple products still need a variant name.
This is important because it helps display the exact version of the product customers are buying.
For example:
Size 42
If you were selling:
- clothes → you might use Medium or XL
- perfumes → you might use 100ml
- electronics → you might use storage size or model
The variant helps customers clearly identify the product option available.
Step 11: Select the Option Type
The option type defines what the variant represents.
For example:
- Size
- Color
- Material
- Storage
If the variant is a shoe size, choose:
Size
This ensures it displays properly on your storefront.
Step 12: Add Variant Stock
The variant stock tells Uzanga how many of that specific variation are available.
For example:
Size 42 → 1 item available
This is especially important when dealing with products where each variation has different stock quantities.
Step 13: Add Product Cost
The cost field is mainly used for analytics and profit tracking.
Customers do not see this value.
For example:
- Buying cost: Ksh 2,000
- Selling price: Ksh 3,500
This helps you track:
- profit margins
- business performance
- product profitability
inside your Uzanga analytics.
Step 14: Set Publishing Status
When publishing the product, you can choose whether to:
- publish immediately
- save as draft
- display as coming soon
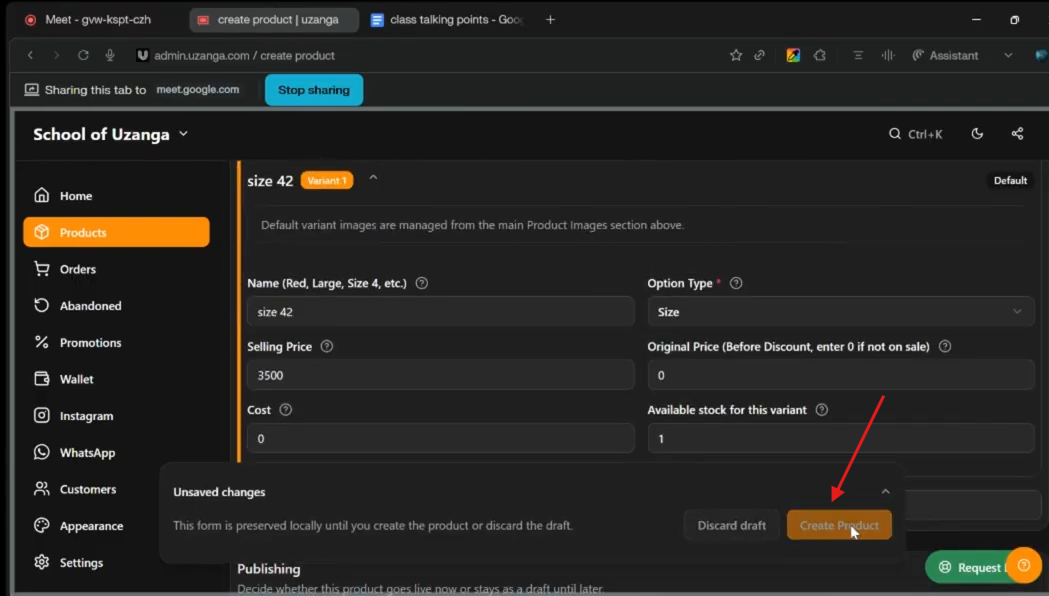
For a normal product ready for sale, simply publish it immediately.
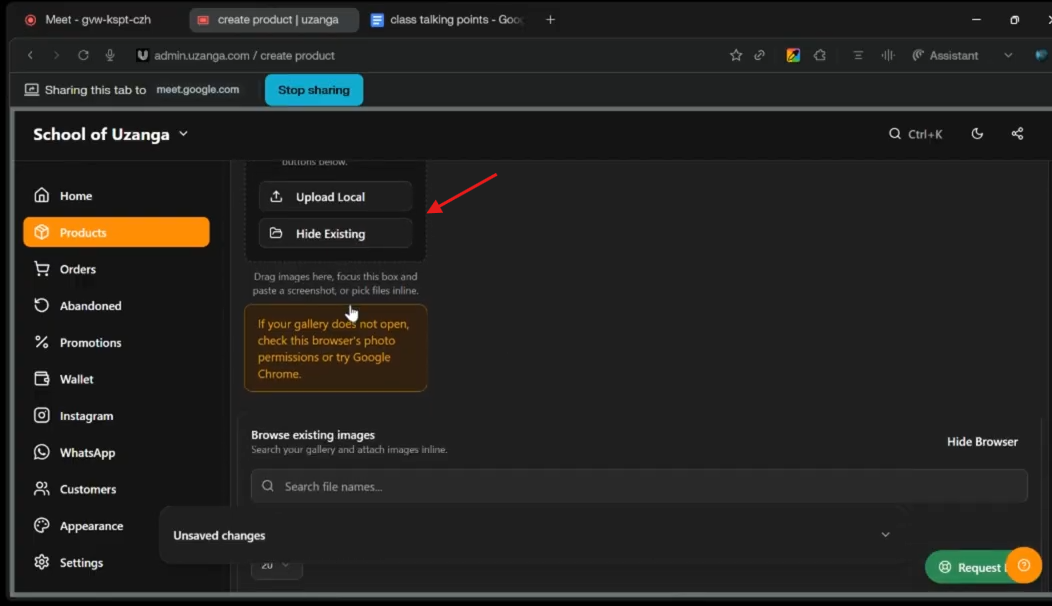
Step 15: Upload Product Photos
Photos are one of the most important parts of your product listing.
You can upload images:
- from your phone gallery
- from your laptop files
- from images already uploaded inside Uzanga
Good product photos help customers trust the product and improve sales.
What Happens After Publishing?
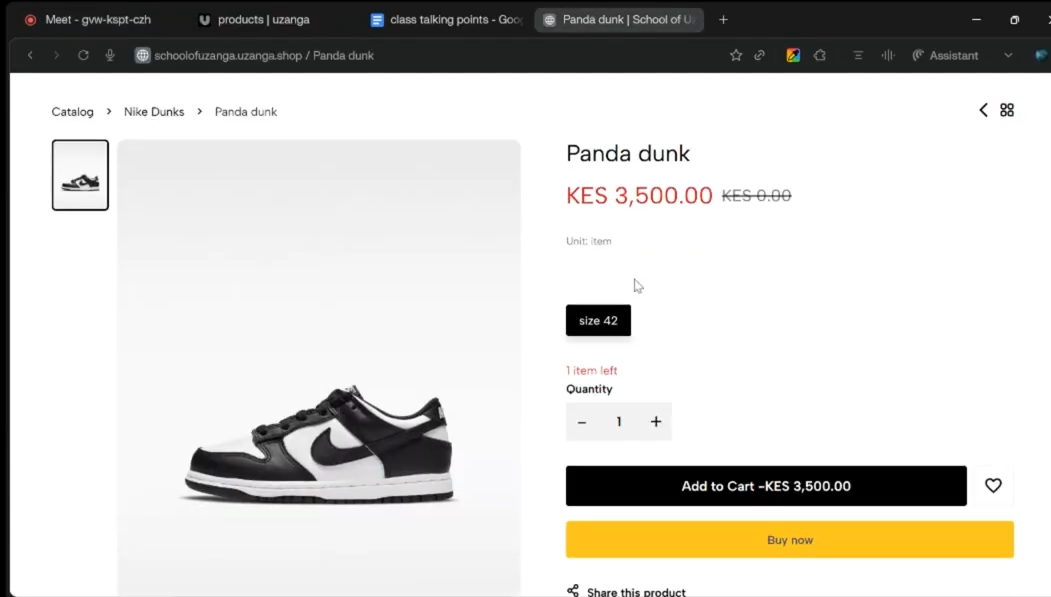
Once the product is published:
- it appears on your storefront
- customers can view it
- the selected variant appears properly
- stock levels become visible
For example, customers may see:
Size 42, 1 item left
This makes the shopping experience clearer and more professional.
Why Simple Products Are Useful
Simple products are perfect for businesses that sell:
- thrift items
- unique products
- one-off stock
- sneakers
- perfumes
- handbags
- accessories
They are fast to upload and easy to manage.
For many businesses, especially those posting stock daily, simple products are the quickest way to keep the store updated consistently.
Helpful Tips When Posting Simple Products
- Use clear product names
Avoid overly complicated titles.
- Add accurate stock quantities
This helps avoid overselling products.
- Use high-quality photos
Good images increase trust and improve conversions.
- Keep descriptions simple but informative
Customers should quickly understand what they are buying.
- Use correct variant names
This helps customers select the correct option easily.
Final Takeaway
Posting a simple product on Uzanga is designed to be quick and straightforward.
Once you understand the basic fields like:
- title
- category
- pricing
- stock
- variants
- photos
You can upload products much faster and keep your storefront updated consistently.
For businesses selling one-off items, thrift stock, sneakers, perfumes, or similar products, simple products are often the easiest and most efficient way to manage inventory on Uzanga.