How to Set Up a Discount For Only a Limited Number of Customers.
Learn how to create limited-time discounts on Uzanga and control how many customers can redeem an offer. This step-by-step guide explains offer setup, scheduling, coupon codes, redemption limits, discount testing, and how to run more effective promotional campaigns on your store.
Discounts are one of the easiest ways to create excitement around your products and encourage customers to buy faster.
But sometimes, you may not want the discount to apply to everyone forever.
Maybe you want:
- a flash sale
- a launch campaign
- a “first customers only” promotion
- a limited VIP offer
- a hype campaign around a new product drop
Uzanga allows you to create discounts with limits so that only a specific number of customers can use them.
In this guide, we’ll walk through how to create a limited discount on Uzanga where only the first 20 customers get the offer.
Why Limited Discounts Work So Well
Limited discounts create urgency.
When customers know:
- the discount is temporary
- only a few people can use it
- the offer may end anytime
they are more likely to purchase immediately instead of postponing.
This works especially well for:
- sneaker drops
- thrift stock
- flash sales
- product launches
- influencer campaigns
- seasonal promotions
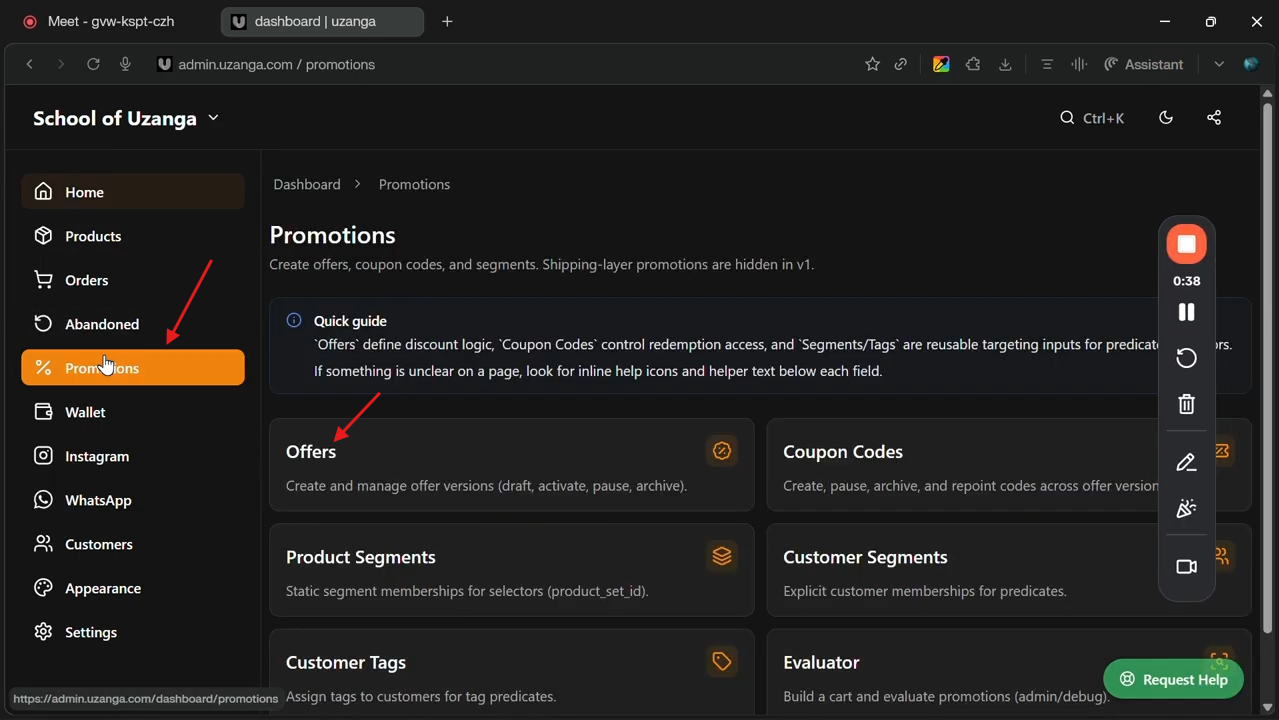
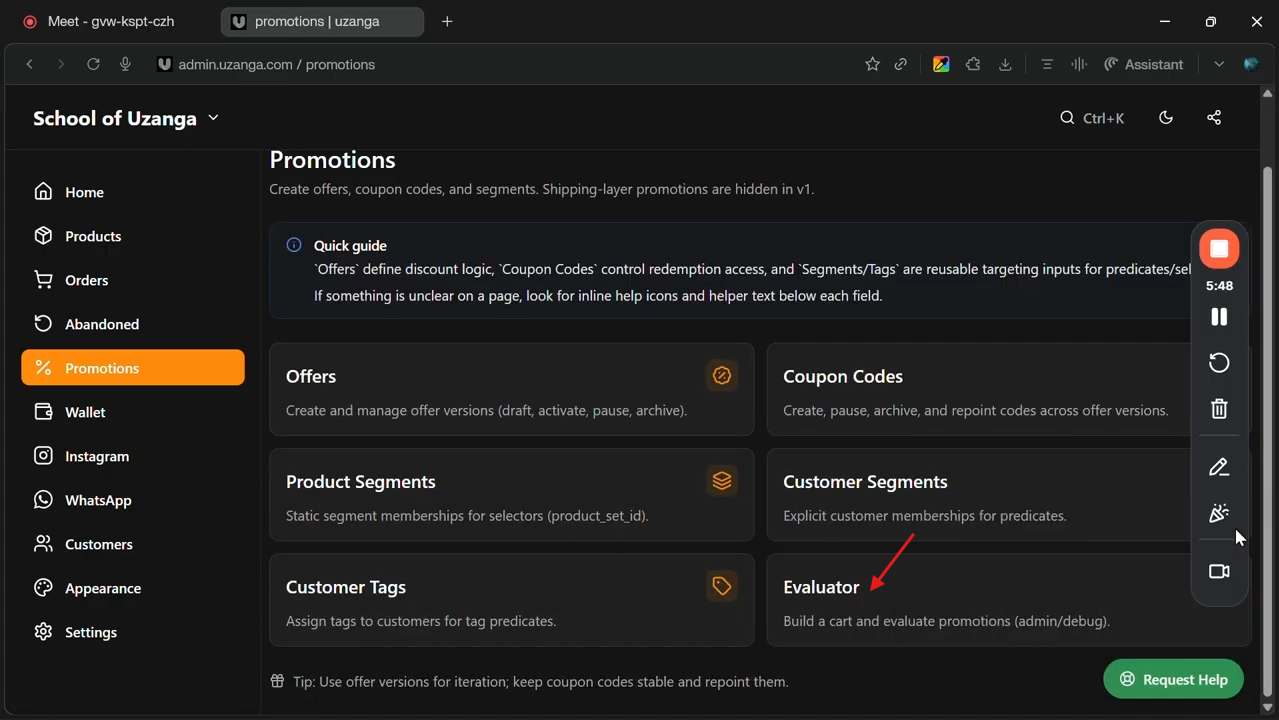
Step 1: Go to Promotions
From your Uzanga admin dashboard:
- Open Promotions
- Click Offers
This is where all your store discounts and promotional offers are managed.
Step 2: Create a New Offer
Click:
Create Offer
You will then begin setting up your discount campaign.
Step 3: Add the Offer Name
The offer name helps identify the discount internally.
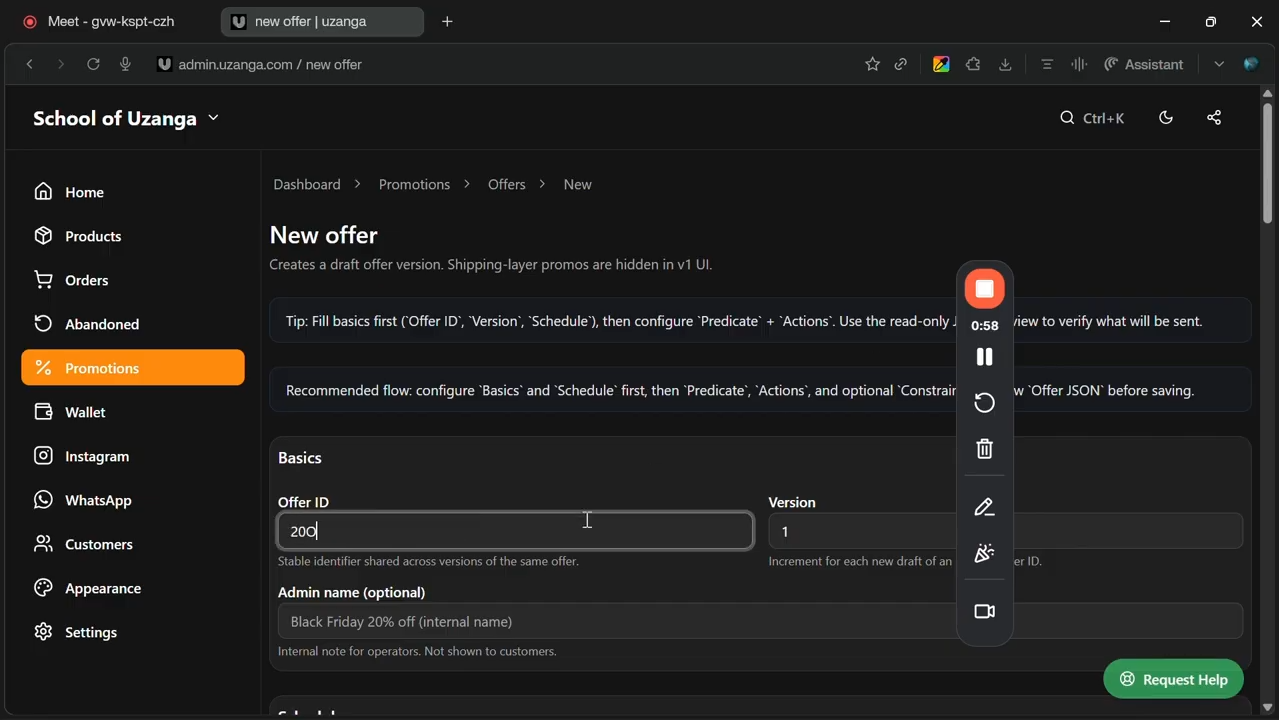
For example:
20% Off for First 20 Customers
You can also use the same name for the admin name to keep things organized.
Choose a name that makes the purpose of the discount easy to understand later.
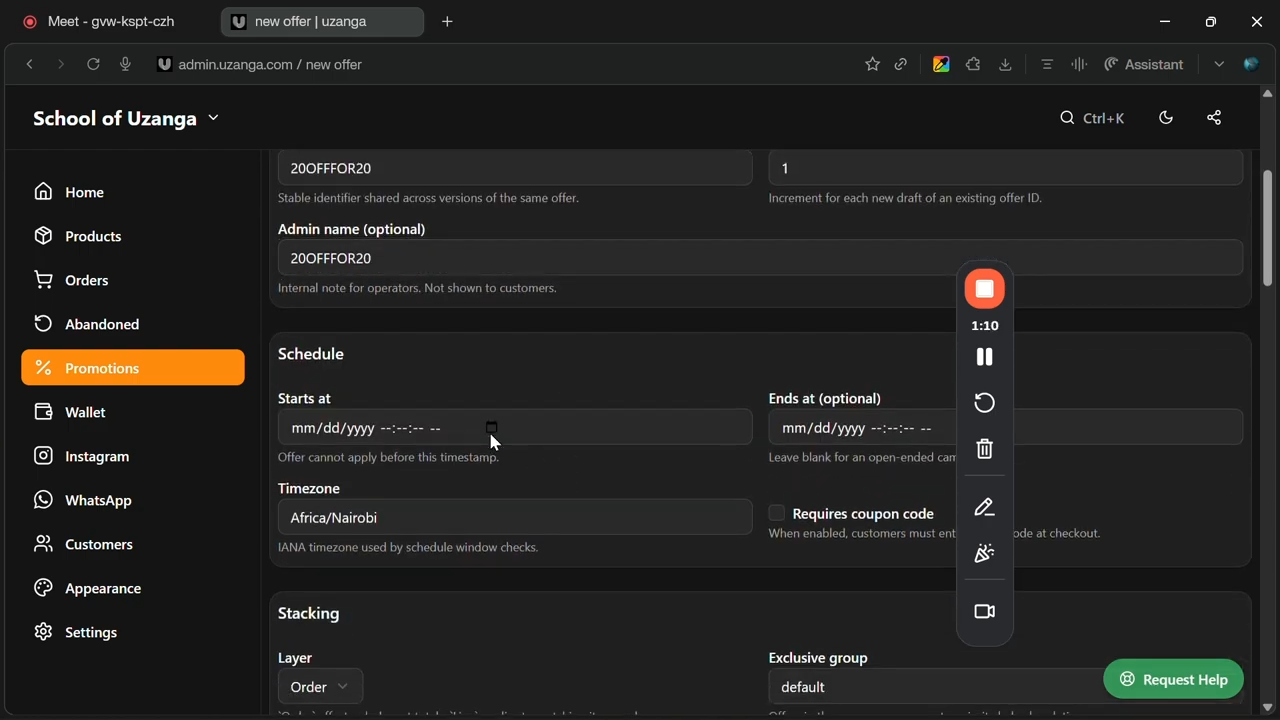
Step 4: Set the Discount Schedule
The schedule controls how long the discount stays active.
For example:
- start immediately
- end after 2 days
- run during a weekend sale
- expire after a launch campaign
This is useful for:
- flash sales
- holiday promotions
- timed product launches
Once the schedule ends, the discount automatically stops running.
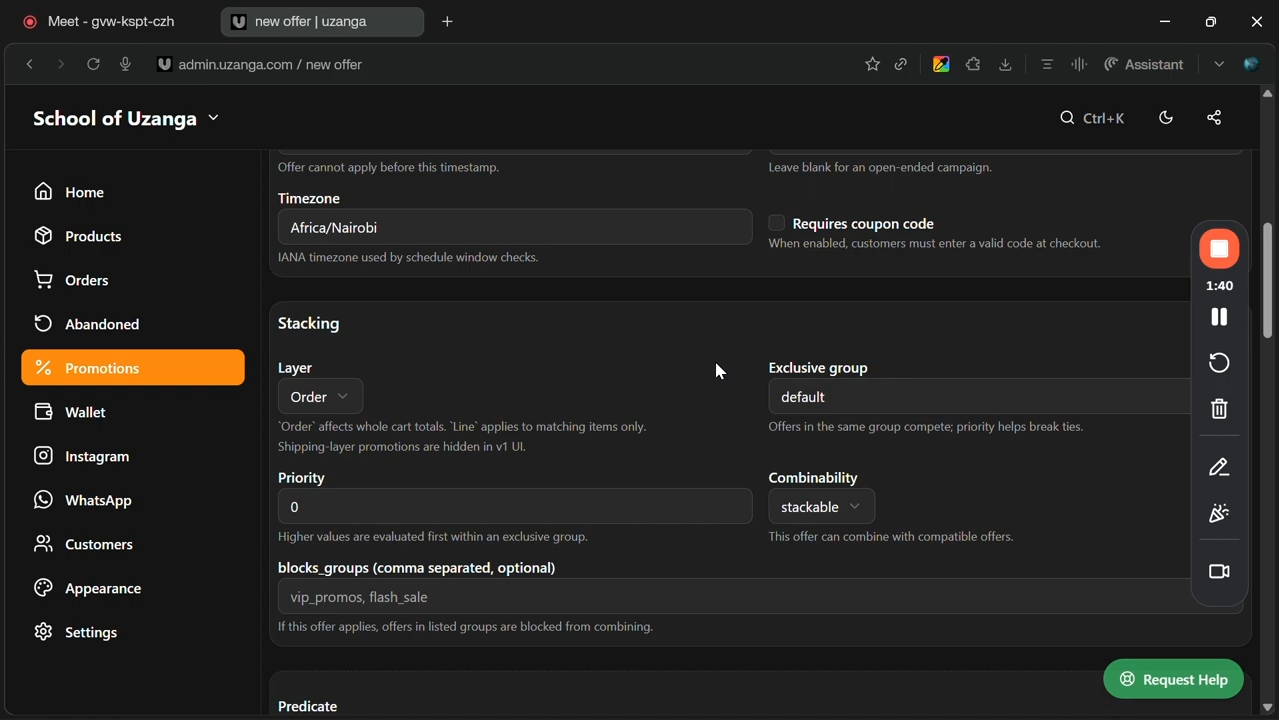
Step 5: Understand Discount Stacking
If you have multiple discounts running at the same time, Uzanga allows you to control which discount gets applied first.
For example, you may have:
- an Easter sale
- a VIP customer discount
- a flash sale
- a first-time customer promotion
The stacking section helps determine:
- which discount takes priority
- which one applies before others
If you only have one discount running, you can usually leave this section unchanged.
Step 6: Set the Discount Conditions (Predicate)
The predicate section defines the condition customers must meet before the discount applies.
This is where Uzanga becomes very flexible.
You can create discounts based on:
- cart subtotal
- customer type
- first-time buyers
- VIP customers
- specific products
- order quantity
- coupon codes
For this example, we will use:
Always True
This means every customer automatically qualifies for the discount while it is active.
Optional: Use a Coupon Code
If you want customers to manually enter a coupon code, you can enable the coupon code option.
For example:
- SAVE20
- FIRST20
- VIPSALE
- FLASH20
This is useful when:
- working with influencers
- running exclusive promotions
- sharing discounts on social media
- tracking marketing campaigns
If coupon codes are disabled, the discount applies automatically.
Step 7: Define the Discount Type
Next, choose the type of discount you want to offer.
Uzanga supports:
- percentage discounts
- fixed amount discounts
For example:
- 20% off
- Ksh 500 off
- Ksh 200 off
In this case, we will use:
20% Off
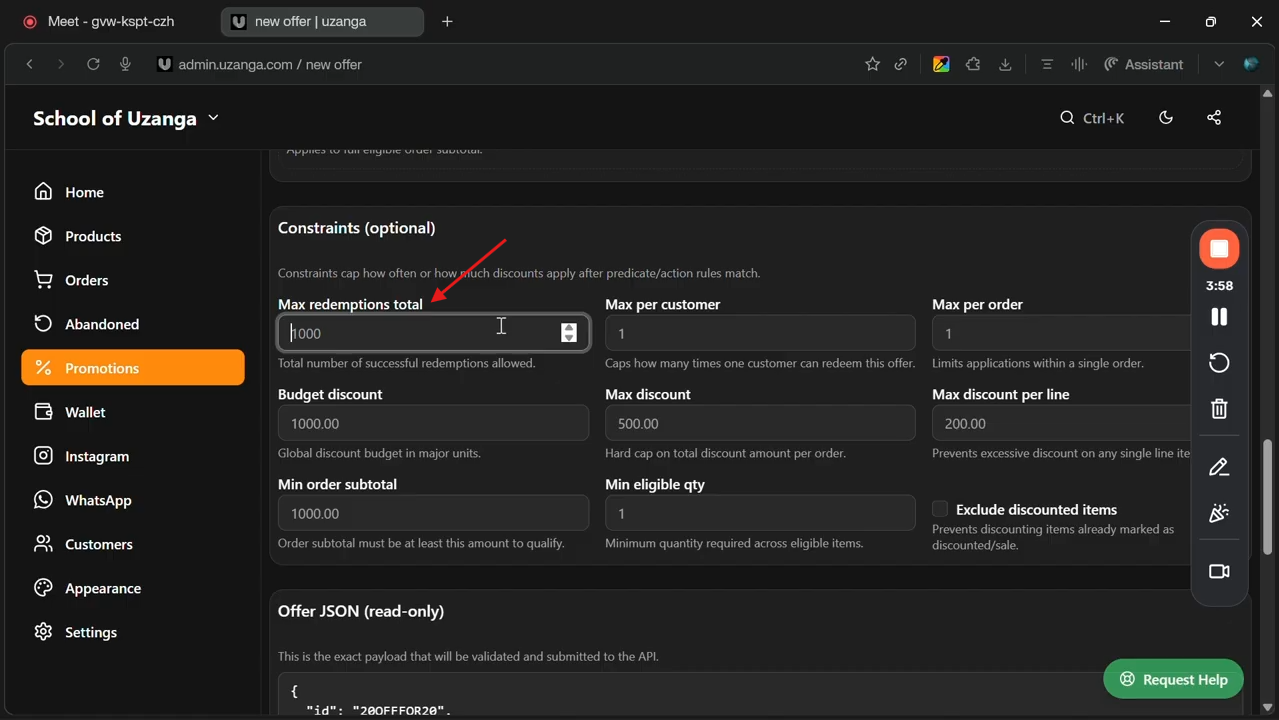
Step 8: Limit the Discount to the First 20 Customers
This is the most important part of the setup.
Inside the limits section:
Set:
Max Redemptions = 20
This means:
- the discount can only be used 20 times
- after the first 20 successful uses, the offer automatically becomes unavailable
This creates urgency and makes the promotion feel more exclusive.
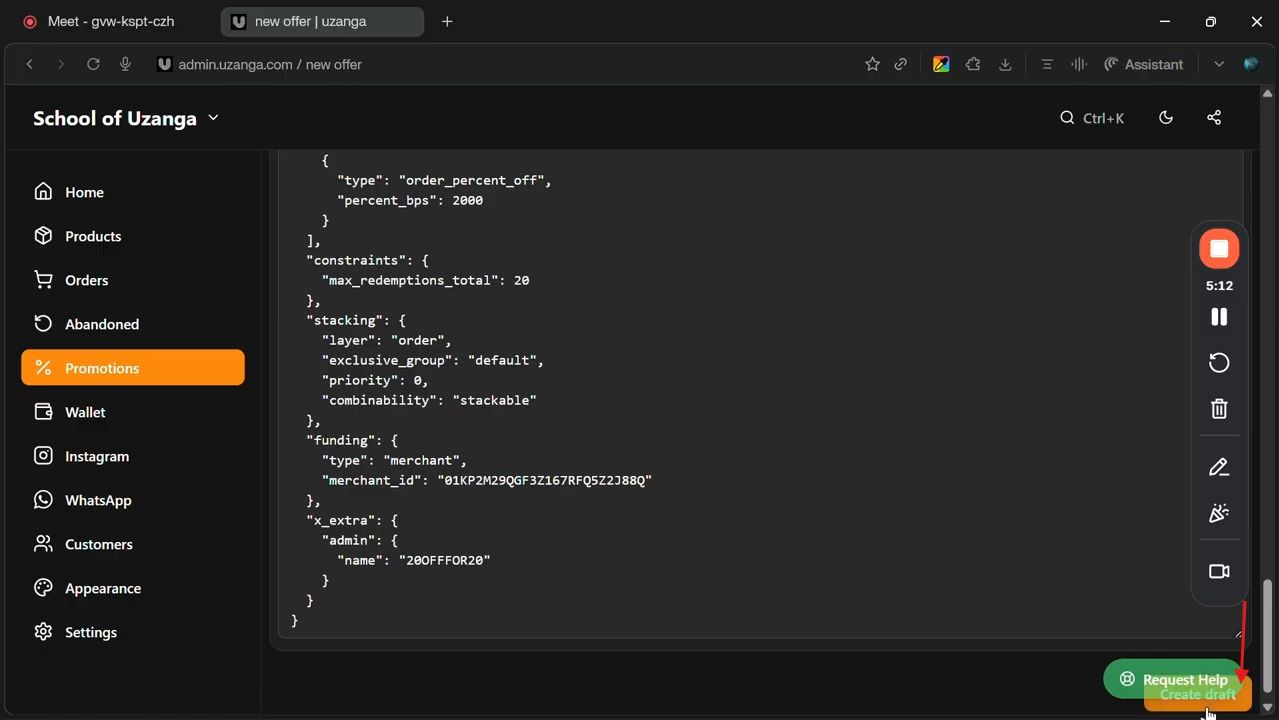
Step 9: Create the Draft
Before activating the discount:
- review all settings
- confirm the schedule
- confirm the percentage
- confirm the redemption limit
- confirm coupon code settings if applicable
Once everything looks correct:
Create Draft
This allows you to review the discount before going live.
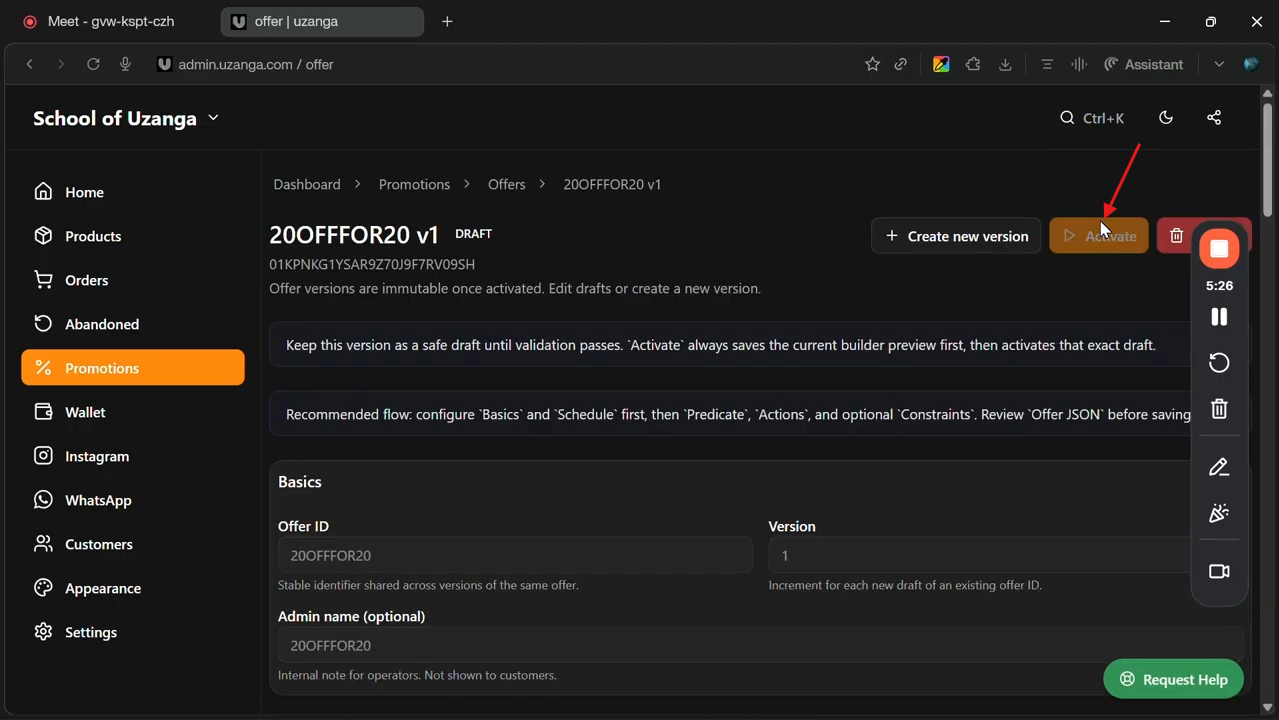
Step 10: Activate the Discount
After confirming the setup:
Activate the Discount
At this point, the promotion becomes active on your storefront.
If the discount is automatic, customers will not need to enter any coupon code.
Step 11: Test the Discount Properly
Before announcing the discount publicly, always test it first.
This is extremely important.
Testing helps confirm:
- the percentage is correct
- the conditions work properly
- the discount applies correctly
- no pricing mistakes exist
For example:
- intended 7% off
- accidentally created 70% off
Without testing, mistakes like this can become very expensive very quickly.
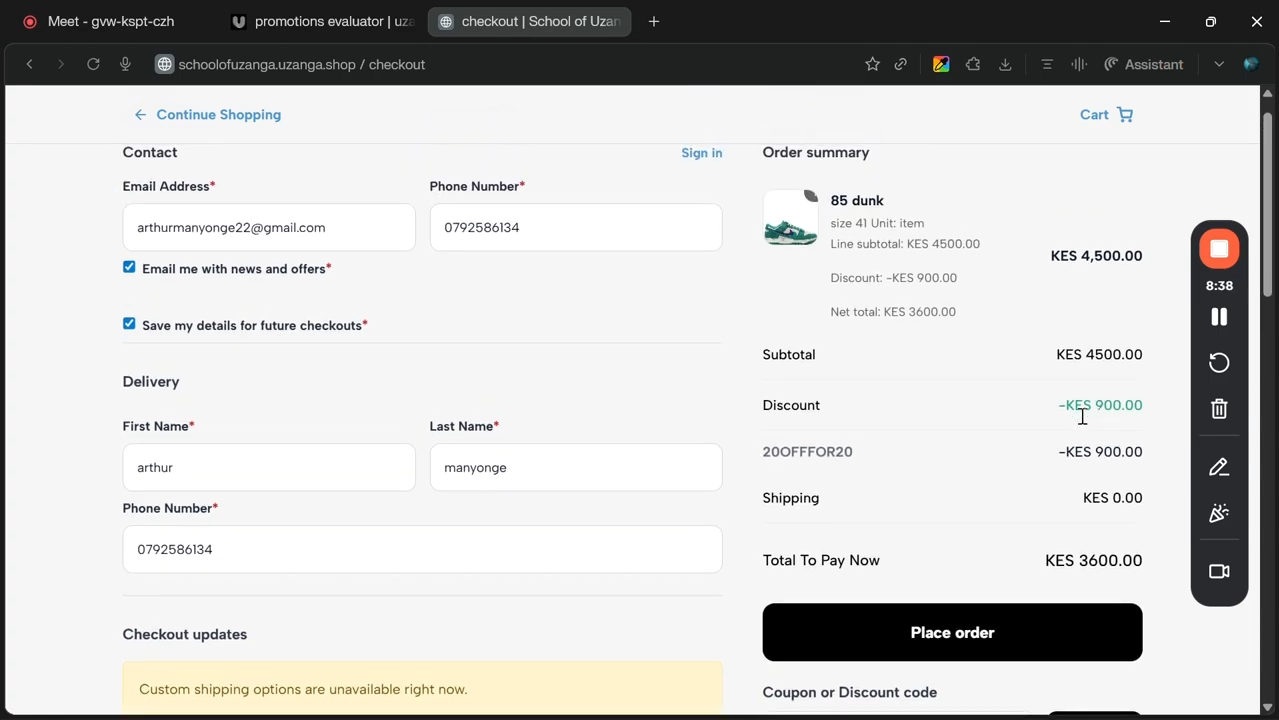
How to Test the Discount
To test:
- Add products to cart
- Proceed to checkout
- Evaluate the discount
- Confirm the discount amount matches your setup
For example:
- Product total: Ksh 4,200
- Discount: 20%
- Amount off: Ksh 840
If the calculations look correct, the discount is ready to go live.
What Customers Will See
Once active, customers shopping on your storefront will automatically see the discount applied.
For example:
20% OFF Applied
If they are among the first 20 customers, they successfully receive the offer.
After the redemption limit is reached, the discount automatically stops working.
Why You Should Avoid Overusing Discounts
Discounts work best when they feel:
- limited
- exciting
- strategic
If discounts happen too often, customers may stop treating them as special.
Instead:
- use discounts intentionally
- create urgency
- make campaigns creative
- tie them to launches or events
This keeps promotions effective without hurting profitability.
Tips for Running Better Promotions on Uzanga
1. Keep discount durations short
Shorter promotions usually create stronger urgency
2. Test every discount before launching
Always verify calculations and conditions.
3. Use redemption limits strategically
Limited offers feel more exclusive.
4. Make the promotion easy to understand
Customers should instantly know:
- what the offer is
- how long it lasts
- how to qualify
5. Stay Profitable
Make sure your pricing still supports your business goals after the discount is applied.
Final Takeaway
Uzanga makes it easy to create limited-time and limited-use discounts directly from your admin dashboard.
By combining:
- discount percentages
- coupon codes
- schedules
- redemption limits
- customer conditions
You can create much more strategic and creative promotional campaigns for your business.
For businesses running product drops, flash sales, launch campaigns, or social-media-driven promotions, limited discounts are a powerful way to increase urgency while keeping campaigns controlled and manageable.