How to Connect Instagram to Uzanga and Post Products Automatically
Save time by connecting Instagram to Uzanga and publishing products to your website and Instagram simultaneously. This guide walks you through setup, posting workflows, captions, product tracking, and common connection fixes.
One of the most useful features on Uzanga, and honestly one of my personal favorites, is the ability to connect your Instagram account so that when you post a product in your Uzanga admin, it goes to your website and to Instagram at the same time.
That means no more posting your stock on your website, then switching apps and spending another hour or two doing the same thing on Instagram. One product entry. One button. Two platforms updated.
That is the whole point here: work efficiently. If you post stock regularly, especially daily, this feature can save you a lot of time and effort.
What you need before connecting Instagram to Uzanga
Before you start, make sure you have the right setup. There are a few requirements, and if one of them is missing, the connection will not work properly.
- An Instagram professional account, either a Business account or a Creator account
- A Facebook account that
- A Facebook Page connected to that Instagram account
The order matters. First create or access your Facebook Page, then connect that page to your Instagram account, and only after that should you go into Uzanga to complete the connection.
Step 1: Create a Facebook Page
If you do not already have a Facebook Page for your business, start there.
On desktop, go to Facebook and open the Pages section. On mobile, open the normal Facebook app and create the page from there.
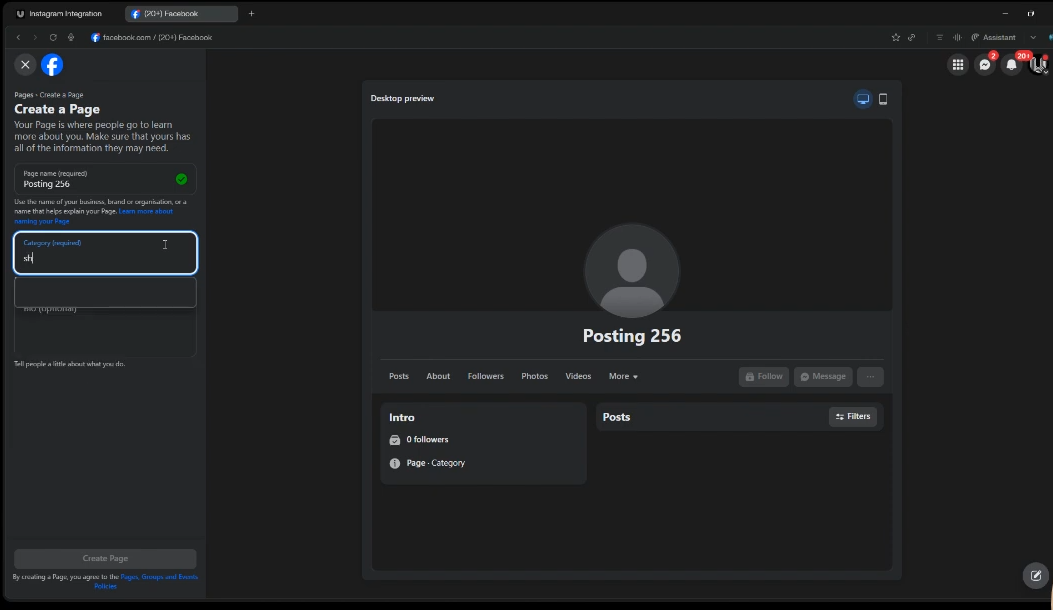
When creating the page, Facebook will ask for the usual details such as:
- Page name
- Category
- Contact details
- Location or region
- Business information
Use your real business details when filling this in. Once you finish setup, your Facebook Page is ready to be linked to Instagram.
Step 2: Connect your Facebook Page to Instagram
Before connecting Instagram inside Uzanga, it is recommended to first prepare the connection properly inside Meta Business Suite.
1. Switch to the Correct Facebook Page
Log in to Facebook using a desktop browser.
If you manage multiple pages, switch from your personal profile to the Facebook Page you want to use with Uzanga.
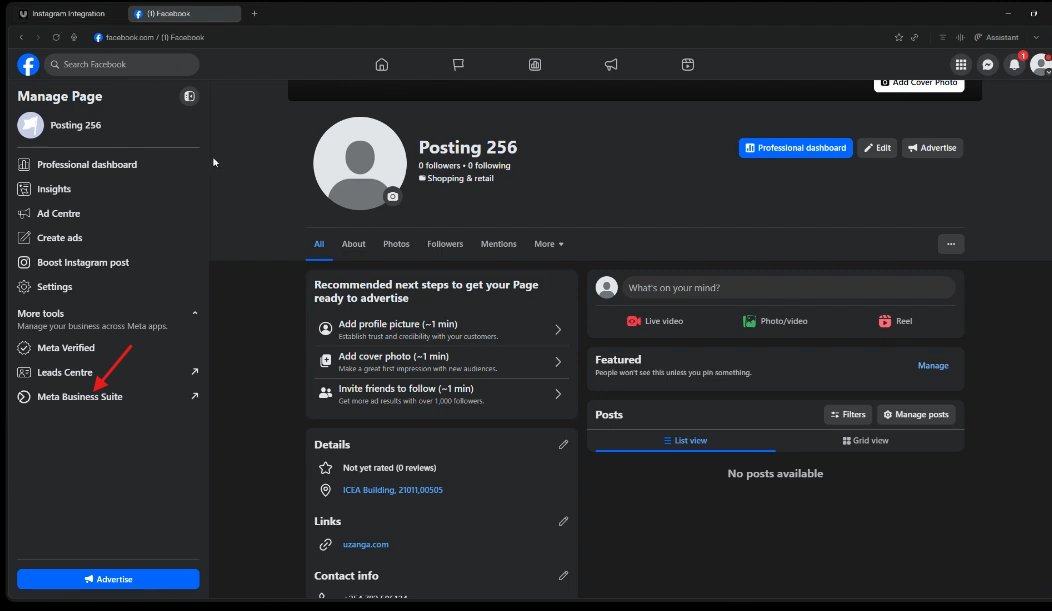
2: Open Meta Business Suite
From the left-side menu in Facebook, click Meta Business Suite.
This will open the Meta Business dashboard in a new tab.
3: Open Settings and Select Your Page
Inside Meta Business Suite:
- Go to Settings
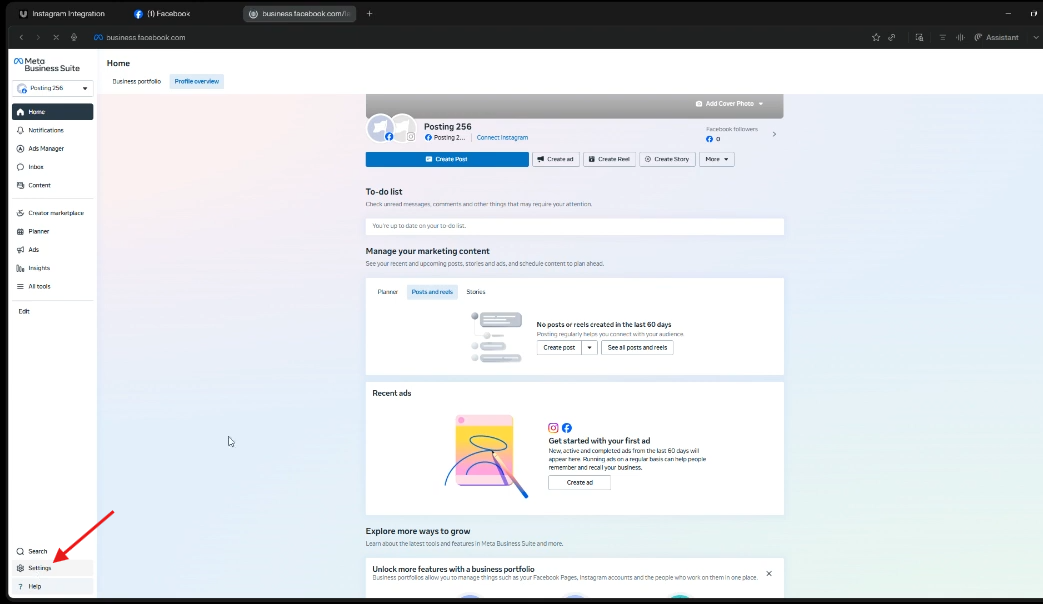
- Open the list of Pages you have access to
- Select the Facebook Page you want to connect to Instagram
Make sure you choose the correct business page before continuing.
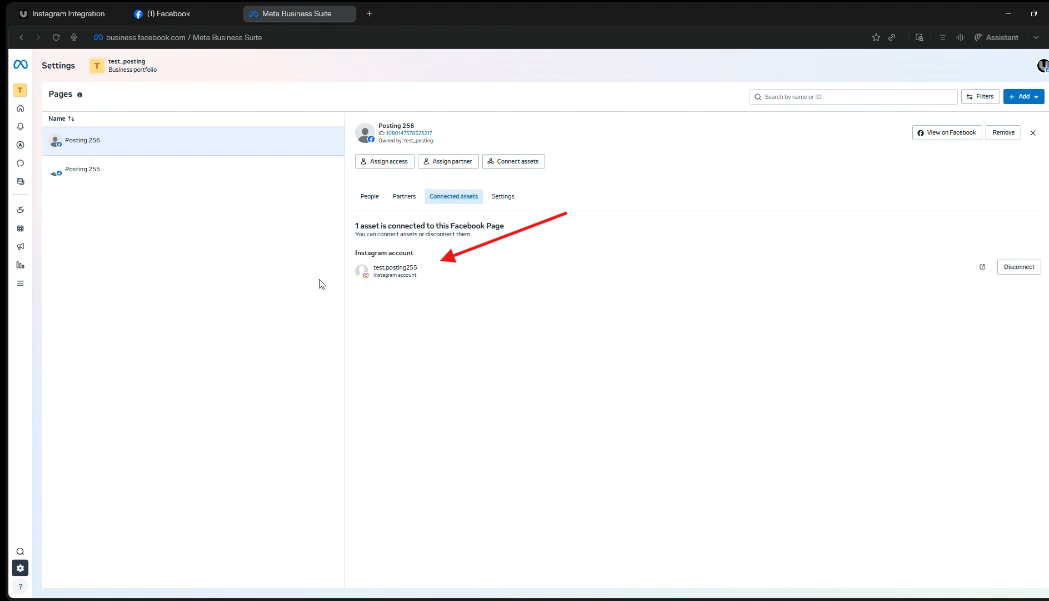
4: Connect Instagram to the Page
Inside the Page settings panel:
- Find the option labeled Connect Instagram
- Click Connect Instagram
- Log in to the Instagram account you want to use
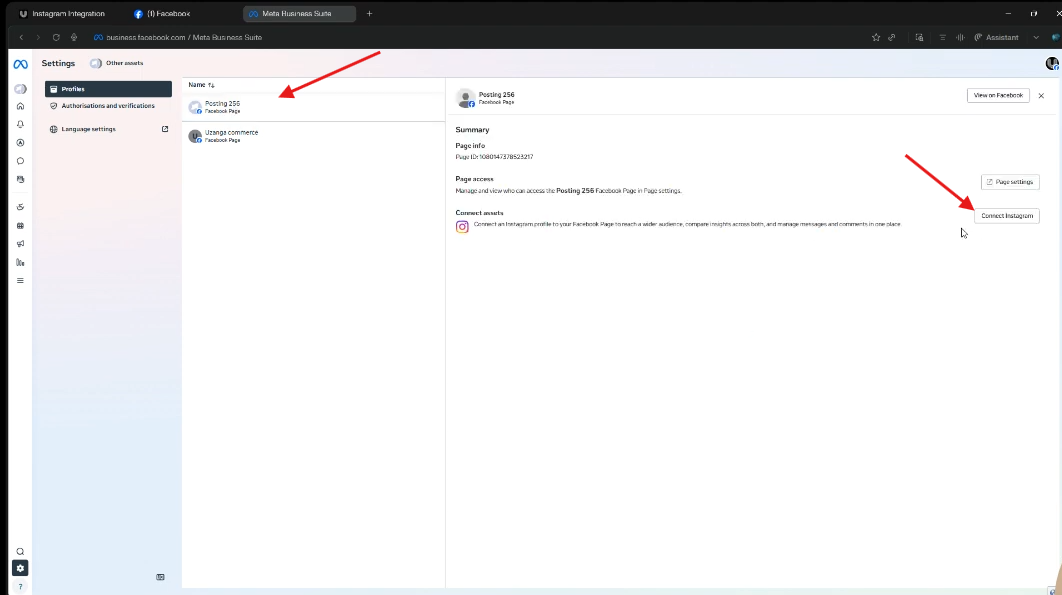
If you manage multiple Instagram accounts, double-check that you are connecting the correct one.
5: Complete the Instagram Prompts
Instagram may prompt you to switch the account to a Professional account if it is still personal.
Choose either:
- Business account
- Creator account
Continue through the prompts until the connection is fully completed.
Once done, your Facebook Page and Instagram account will be linked correctly and ready to connect inside Uzanga.
Step 3: Connect Instagram inside Uzanga
After Facebook and Instagram are properly linked, head over to your Uzanga admin.
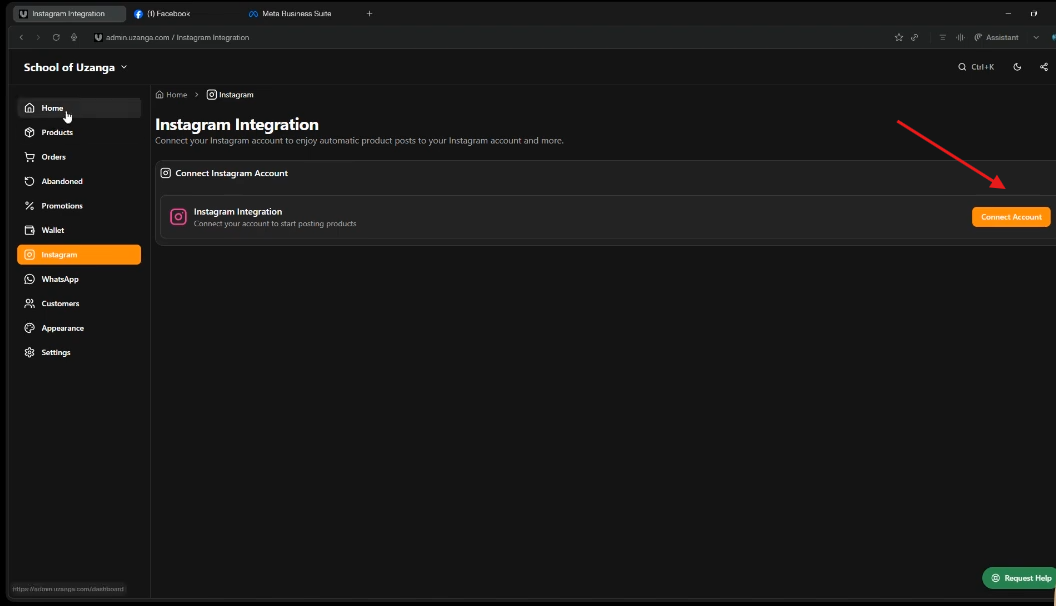
From the homepage in your admin:
- Click Instagram
- Click Connect account
- Choose your Instagram account type, which should be a professional account
- Click Complete Instagram connection
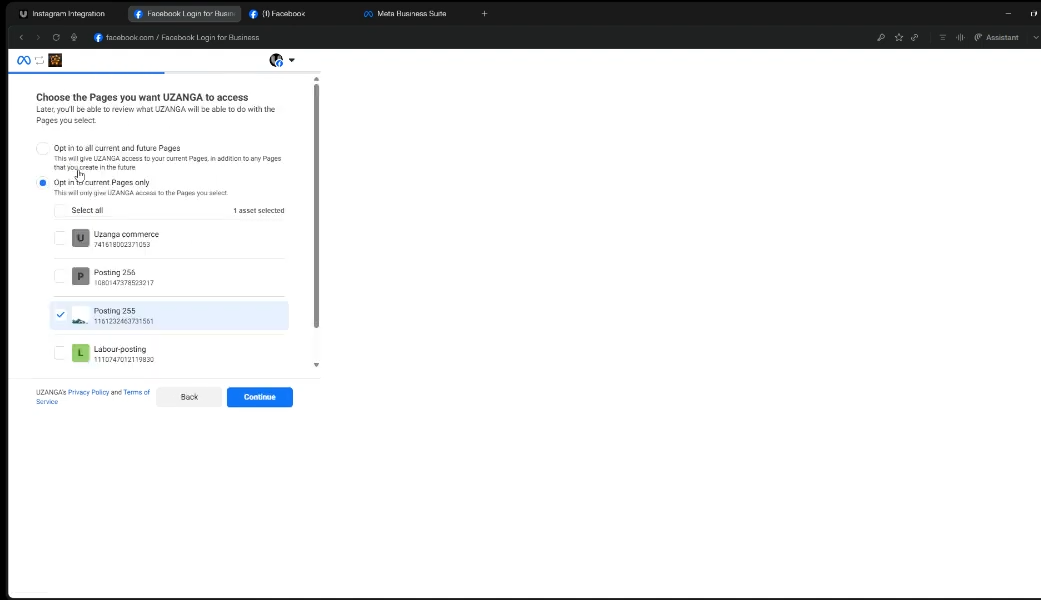
Uzanga will redirect you to Facebook so you can authorize access to your Instagram account.
This part is important: use the same Facebook account you used to connect your Instagram account to the Facebook Page.
If Facebook asks you to choose which page and Instagram account to enable, select only the page you want to use and the specific Instagram account you want connected. Save the changes and continue.
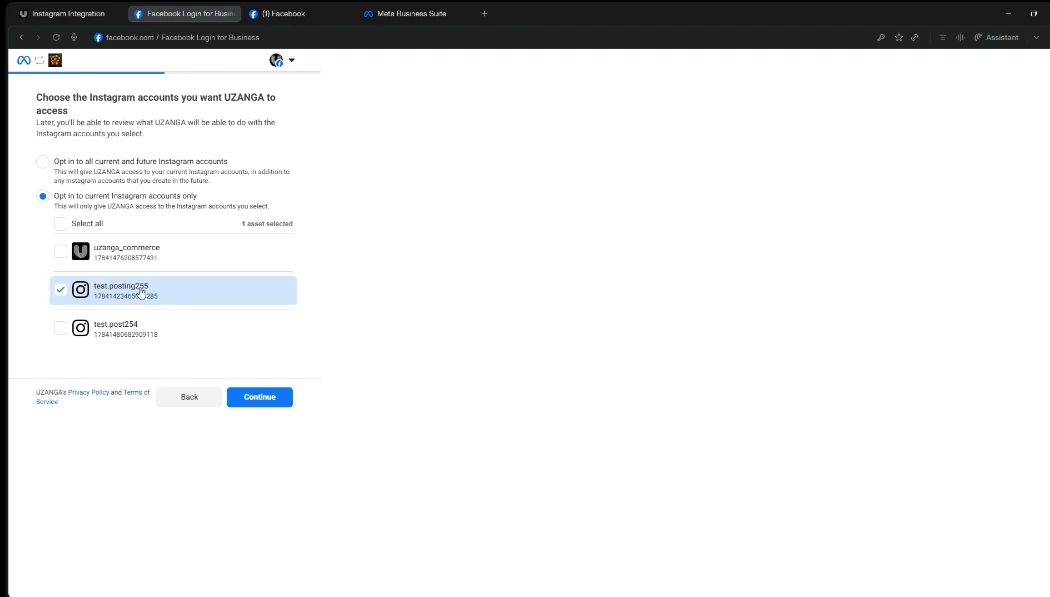
Once everything goes through successfully, Uzanga will show that your Instagram account is connected.select the IG page you want to connect
How posting to your website and Instagram works
Once the connection is complete, posting products becomes much easier.

When adding a new product in Uzanga, you fill in the product form as usual: product name, description, price, stock, images, and any other fields you normally use. The difference is that now you also get the option to post that same product to Instagram.
While creating the product, check the box that allows Uzanga to also post on Instagram.
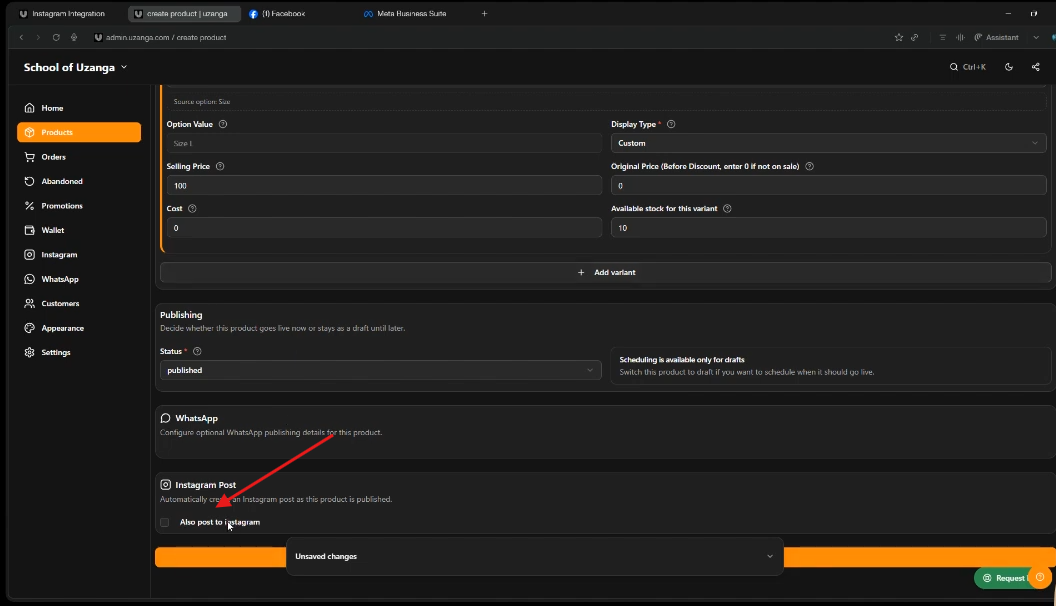
That is it. When you publish the product, it will go to:
- Your Uzanga website
- Your Instagram account
Same product. Same workflow. Much less manual work.
What to put in the product description for Instagram
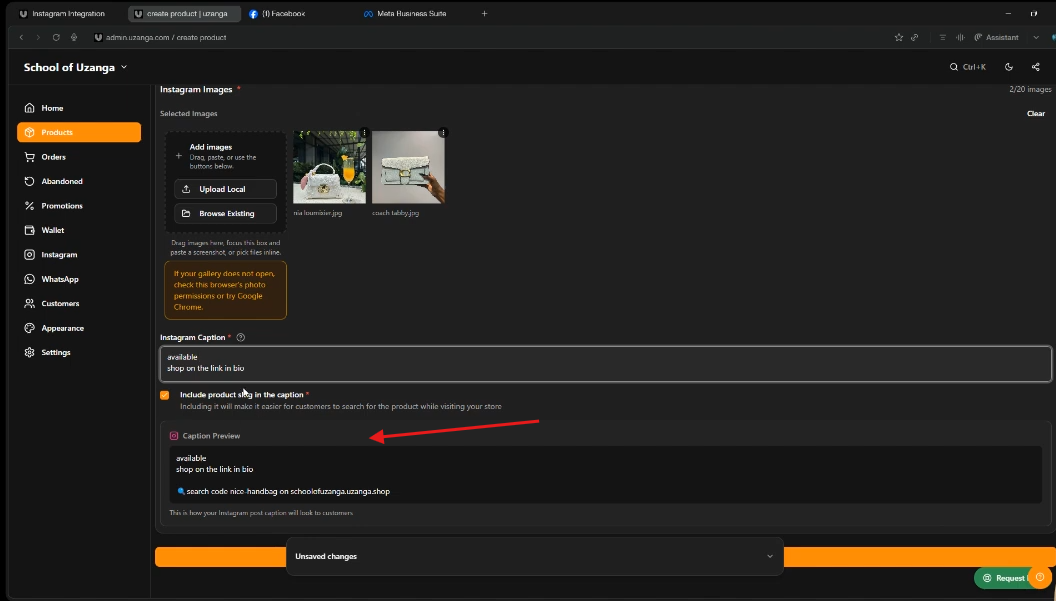
The product description you enter in Uzanga is what appears in the Instagram caption.
If you are a thrifter or a business that posts stock every day, you probably already have a caption template saved in your notes. That template might include details like:
- Size
- Availability
- Price
- Store location
- A prompt to shop via link in bio
That is exactly the kind of text you should paste into the product description when creating the product in Uzanga.
For example, a short caption could be something like:
- Available. Tap shop on the link in bio.
This keeps your Instagram posting process consistent without forcing you to type the same thing again and again.
Use saved values to post faster
If you are adding lots of products, especially clothes or shoes, speed matters.
One helpful tip is to use saved values for fields you use all the time. For example, if you often post sizes like S, M, L, XL, or standard shoe sizes, you can save those values in your settings and reuse them instead of typing them from scratch each time.
It is a small shortcut, but if you have a lot of stock and not a lot of time, these shortcuts add up.
What happens to product images
When you choose to post to Instagram from Uzanga, the images you upload for the product will be used in the Instagram post as well.
If you add multiple images, they appear in the same order on Instagram. The image quality is also maintained.
That means you do not need to upload the same photos twice or rearrange them manually after posting.
Why you should keep the product slug in the Instagram caption
This is one of the smartest parts of the whole setup.
When Uzanga posts the product to Instagram, it can include the product slug in the caption. It is a good idea to leave that in place.
Why? Because it makes it much easier to track and manage products later, especially if you sell through Instagram DMs.
Here is the real-world problem it solves.
Imagine a customer buys a pair of shoes through Instagram messages. They send you the post, you agree on the sale, and now you need to update the stock in your website admin. But your store has hundreds of products, and maybe several of them look almost identical.
Instead of guessing which product it was, just copy the slug from the Instagram caption, paste it into search in your Uzanga admin, and it will bring up the exact product.
Then you can update the stock immediately and mark it sold out if needed.
This is especially useful for businesses selling similar-looking items like shoes, bags, or repeated categories of thrift stock.
How to find the matching Instagram post from inside Uzanga
It also works the other way around.
Let’s say a product sold on your website, and now you want to update the Instagram caption to show that it is sold out. Instead of scrolling through months of Instagram posts trying to find it manually, Uzanga gives you a shortcut.
In your product listing inside Uzanga:
- Open the product
- Click Actions
- Select Instagram posts
This takes you directly to the exact Instagram post linked to that product.
From there, you can edit the caption and add something like Sold Out.
If you have been posting for months, this is a huge time saver. No endless scrolling. No trying to match products by memory.
Common setup reminder if the connection does not go through
If you run into issues during setup, one common cause is selecting the wrong Facebook Page or enabling too many pages during the Facebook authorization step.
When Facebook asks which page and Instagram account you want to connect, keep it clean:
- Choose the correct page
- Choose the correct Instagram account
- Enable only what is needed
And again, make sure the Instagram account is set as a professional account, not a personal one.
Why this feature matters for businesses posting daily stock
If your business depends on frequent product uploads, this is not just a nice extra. It is a proper workflow upgrade.
Instead of treating your website and Instagram as two separate posting jobs, Uzanga lets you treat them as one system. You add the product once, keep your branding consistent, maintain photo quality, and save hours over time.
For businesses selling on both channels, that kind of efficiency matters a lot.
It is the difference between spending the day doing repetitive admin work and spending that time actually selling.
Need help?
If you still have questions while setting things up, Uzanga includes support options inside the platform. You can request help directly, start a help thread, ask a question, or reach out through customer care and social channels.
The main thing is to make full use of the feature. It was built to make your work easier, especially if you are regularly uploading products and using Instagram as a serious sales channel.
Final takeaway
Connecting Instagram to Uzanga gives you a much faster way to publish products across your website and Instagram at the same time.
To make it work smoothly:
- Set your Instagram to a professional account
- Create a Facebook Page
- Connect the page to Instagram in Meta Business settings
- Connect Instagram inside Uzanga
- When posting products, tick the option to also post on Instagram
- Keep the slug in the caption so product tracking stays easy
If you post stock daily, this feature can save you a lot of time and help you keep both your website and Instagram updated without doing the same work twice